How To: Add an Asset

- NOTE: This feature is only available to asset editors. If you do not have asset editing privileges but would like to request them, please send your request to your supervisor/manager. If it is approved, they will make arrangements with your AssetNav site administrator.
This document outlines the steps involved to create a new asset. In this example we will create a new road asset.
Step 1
To add an asset, you will have to provide a unique name for that asset. For this example of roads, we will begin by listing all of our road assets: filter by the description "Road", sort them by name in the "Asset" column, and then go to the last item in the list.
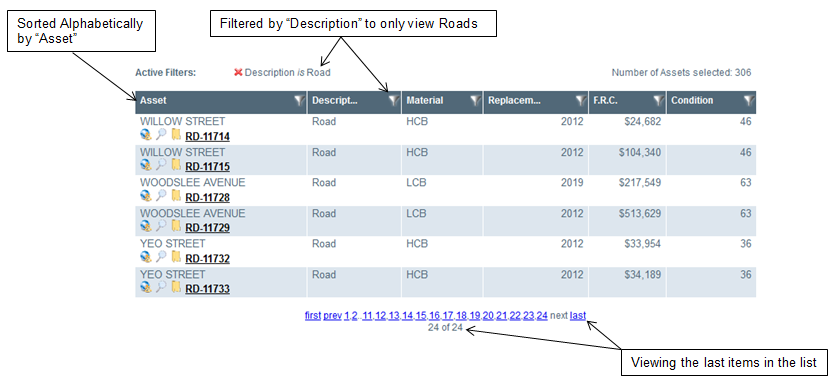
RD-11732
RD-11733
So our new road can be named:
RD-11734
Step 2
Click the [Add] button:
Step 3
The window that pops up will ask you for two pieces of information:
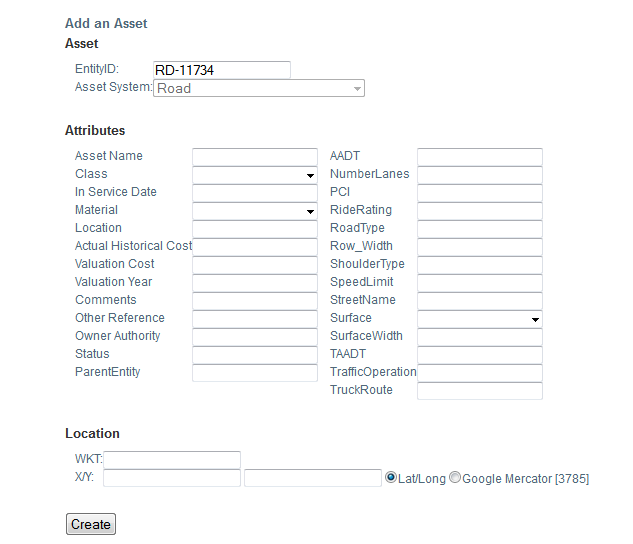
1) An "EntityID", that will be the name of the new asset that you determined in the previous step (in our example it is RD-11734).
2) An "Asset System", which is the type of asset (in our example it will be a Road) After you have entered those two pieces of information, you should click the [Next] button.
Step 4
You will be presented with a new list of information to be added. The contents of this list are determined by the asset system you provided in the previous step. Fill these boxes with all the information you have available. Remember that everything you include here can be edited later.
The "Location" category allows you to enter geo-spatial data. If you want your asset to appear in the "Map" view of AssetNav you must provide this data. WKT: is a well-known text string X/Y: allows you to specify either Latitude/Longitude or co-ordinates in a Mercator projection